
Overview
As part of another project of mine I developed a "paper tape drive" to
control it. This page covers the build and use of this drive for those
that wish to use it. The drive uses a simple paper tape with coloured
rectangles and the RGB sensor block from the MindCub3r by David Gilday to provide nine
"commands". These commands could be anything within your code; For me
they represented the operators < > [ ] + - , . EOF, based on a rather
esoteric programming language.
Paper Tape
The paper tape has deliberately been kept simple. It is made from strips
of A4 cut to width, and coloured in using felt-tip pen, the stuck
together using adhesive tape. The tape drive is 3 bricks wide internally,
so 24mm. As such, the tape I use is 22mm wide to allow for leeway.
The length of each block is left to the user, although the length will
need to be sufficient for any colour change to be detected as well as an
accurate colour reading. All blocks on a single tape must be the same
length; The system has a "Calibrate" MyBlock which will determine the
initial block size. I personally use blocks 22mm long so that the tape
is divided in to squares.
Only the central section of the strip needs to be coloured, i.e. the section
under the sensor. Experimentation has found this middle section needs to be
a minimum of 12mm wide. This also has the added benefit that the regions
above and below each coloured area may be used for annotation purposes.
The tape does not, in general, need to be accurately coloured in, just
sufficiently well. The system as it runs will keep a track of the average
block length, and will maintain block alignment. An example of a tape, and how
it can be coloured is shown below; This tape has yet to be joined.
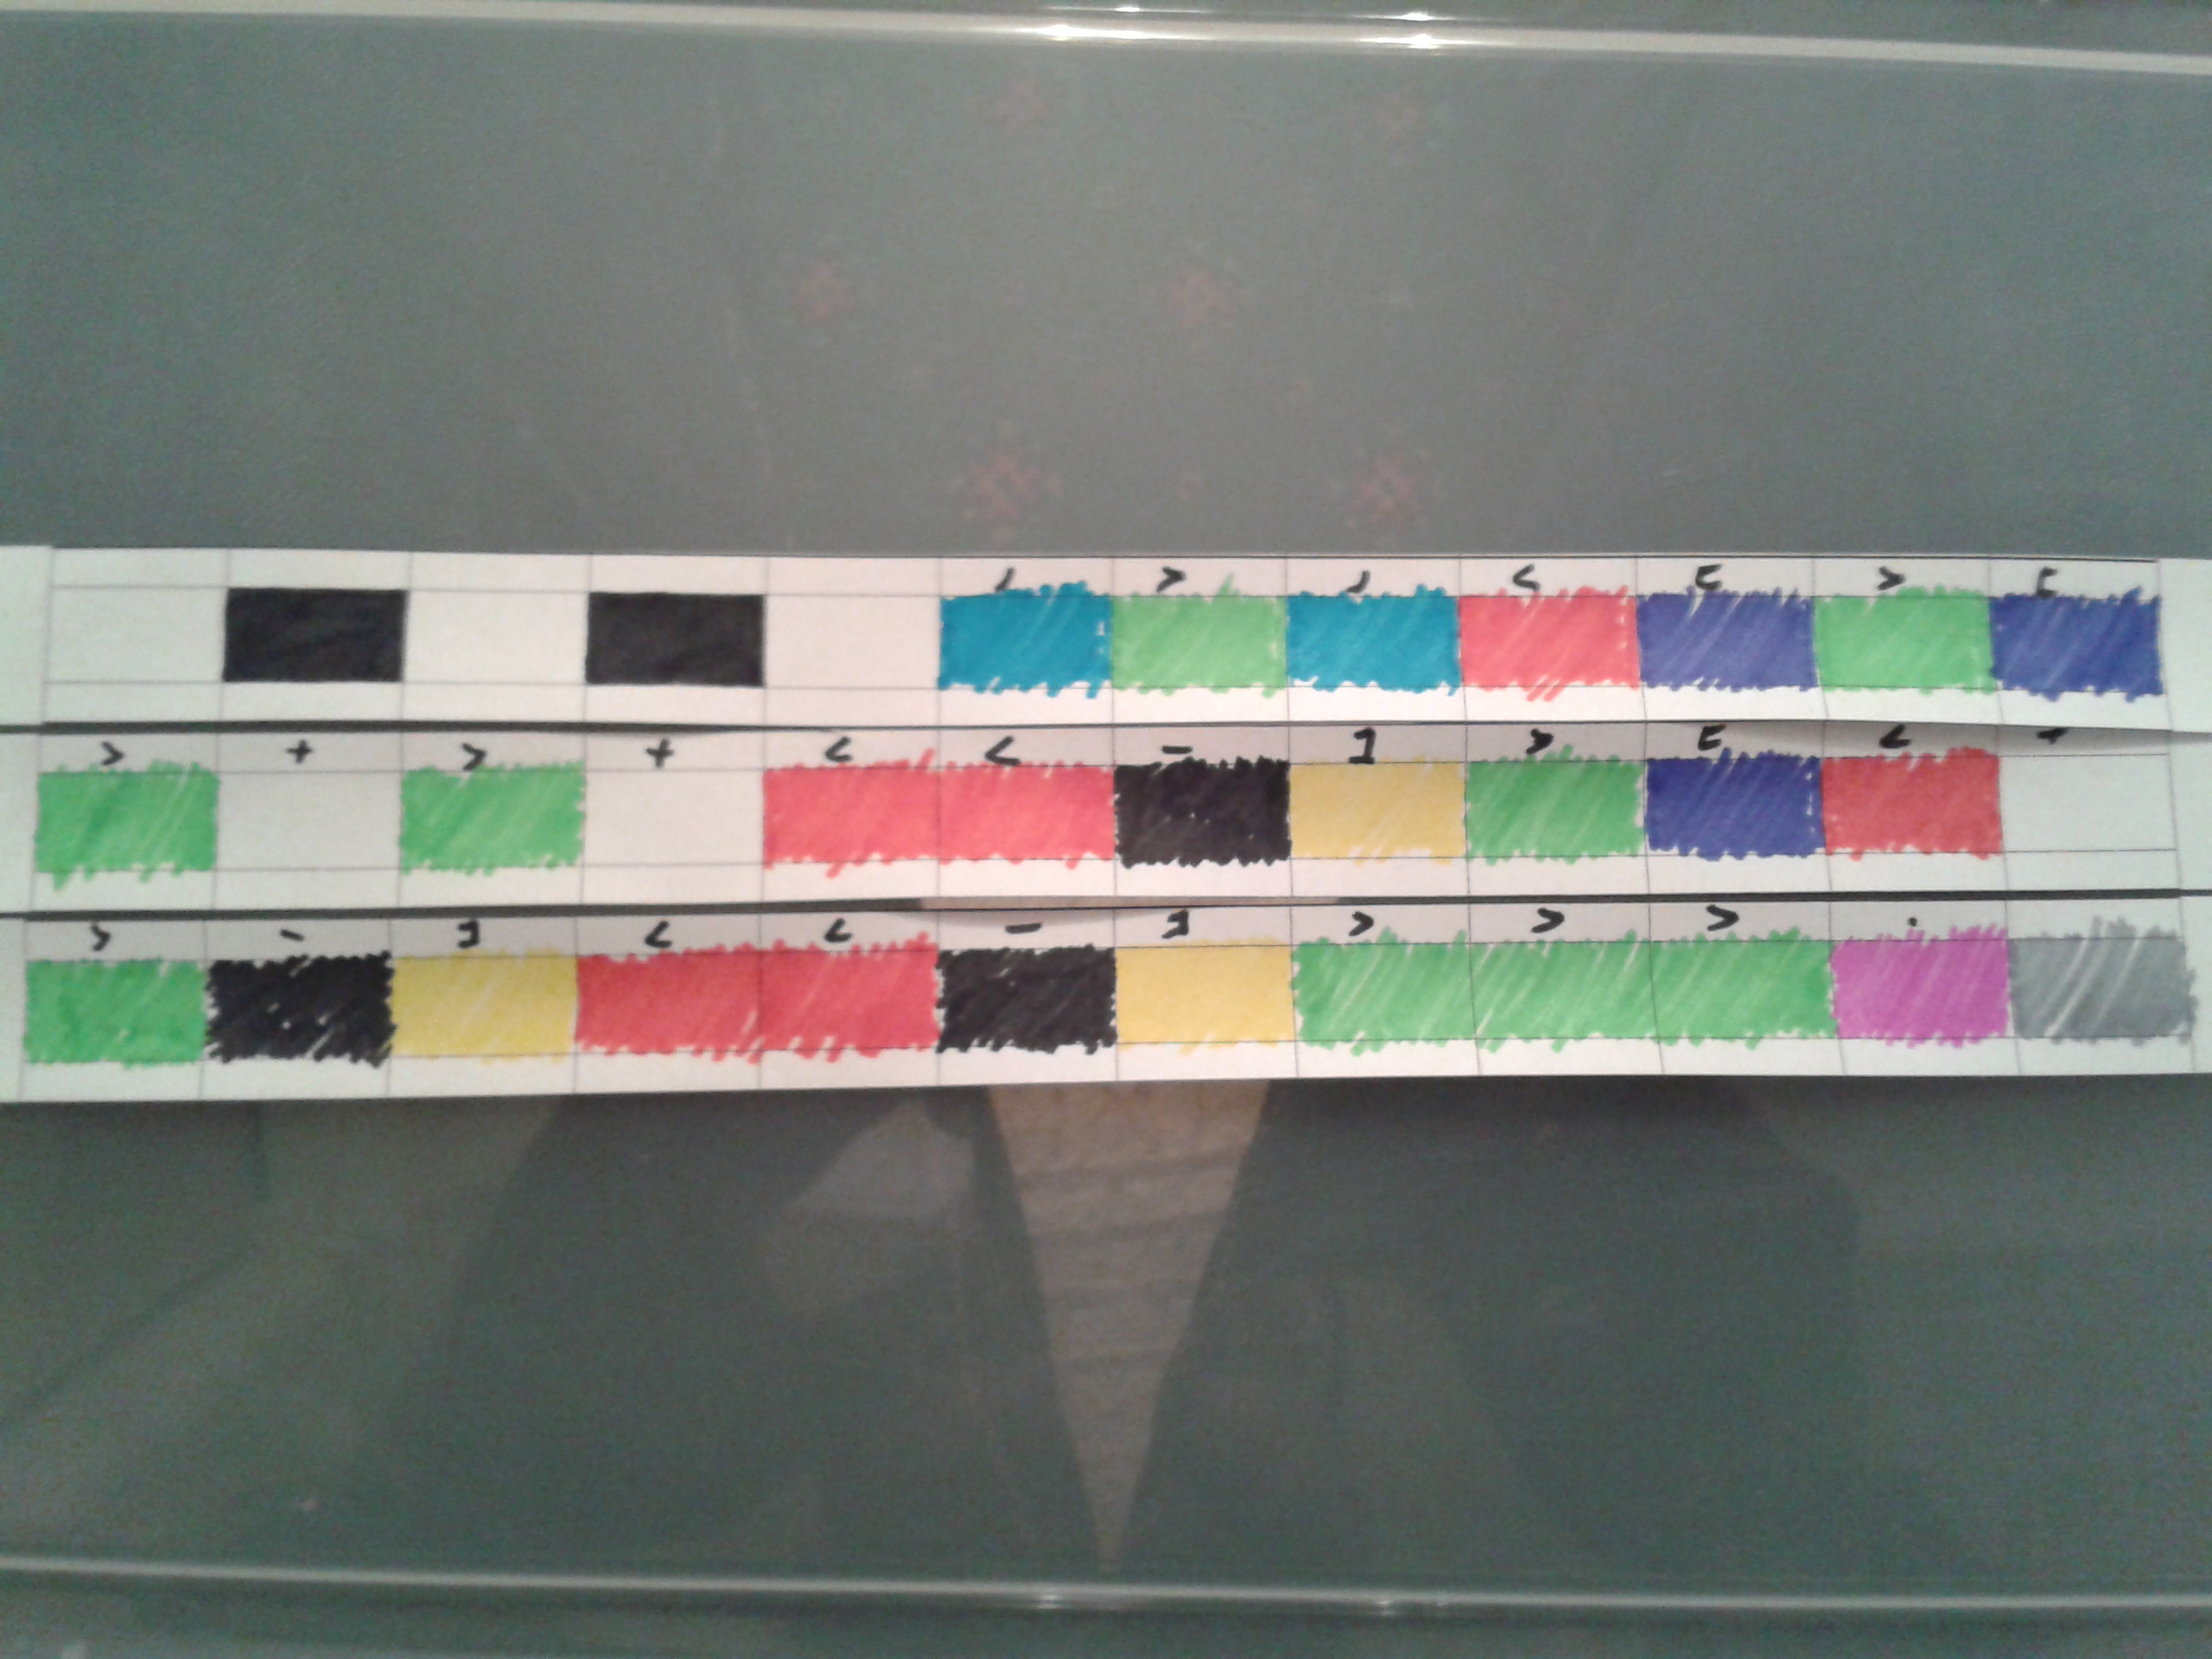
The example tape shows the calibration header, along with annotations
for the program above each colour block. In the resources section,
below, I have included a PDF and MS Publisher document for the tape
template I use; Simply cut width-ways along the bold lines.
Auto Calibration
As already stated, the system has a calibration routine. This relies on
the first 5 blocks on a tape alternating white/black, as shown in the
photograph. I suggest that the black blocks are either coloured in well,
or printed on the tape, as this will help the system to accurately
detect the initial block spacing and location.
The second stage of the calibration routine detects the backlash in the
drive. The tape will oscillate back and forth ten times across the last
black/white boundary to measure the difference in location of the
transition. The backlash is a problem for when the tape changes
direction, so must be adjusted for.
MyBlocks
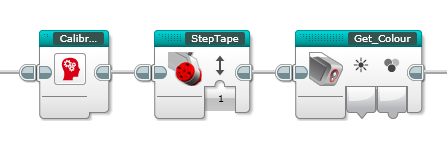
There are three primary MyBlocks for use within programs:
CalibrateTape
This should be called near the start of any program. As already
covered, this is used to calibrate the drive with respect to the tape.
StepTape
This block is used to advance or reverse the tape. It takes one
parameter which can only be 1 or -1. '1' will advance the tape by one
block, '-1' will reverse the tape by one block. Any other value will
result in an error message and the progam will wait for the centre
button to be pressed before halting.
Whilst stepping, this block will track the most recent boundary between
colour blocks and an exponentially weighted moving average of the block
size. This ensures that any slippage in the tape drive is compensated
for.
Get_Colour
This block is used to return a 3 bit RGB value and a 'bright' boolean.
Internally this MyBlock converts the RGB input from the colour sensor to
an HCI value. This is then processed into the output value. This system
allows for the accurate detection of 9 colours:
| RGB | Bright | Colour |
|---|
| 000 | x | |
| 001 | x | |
| 010 | x | |
| 011 | x | |
| 100 | x | |
| 101 | x | |
| 110 | x | |
| 111 | 0 | |
| 111 | 1 | |
It may be possible to detect the difference between a bright and a dark
colour, but I have had no need of this capability so have not pursued
this. You may need to try different inks to find good colours. The
photograph above shows what colours have worked well for me.
Example Programs
Example_1
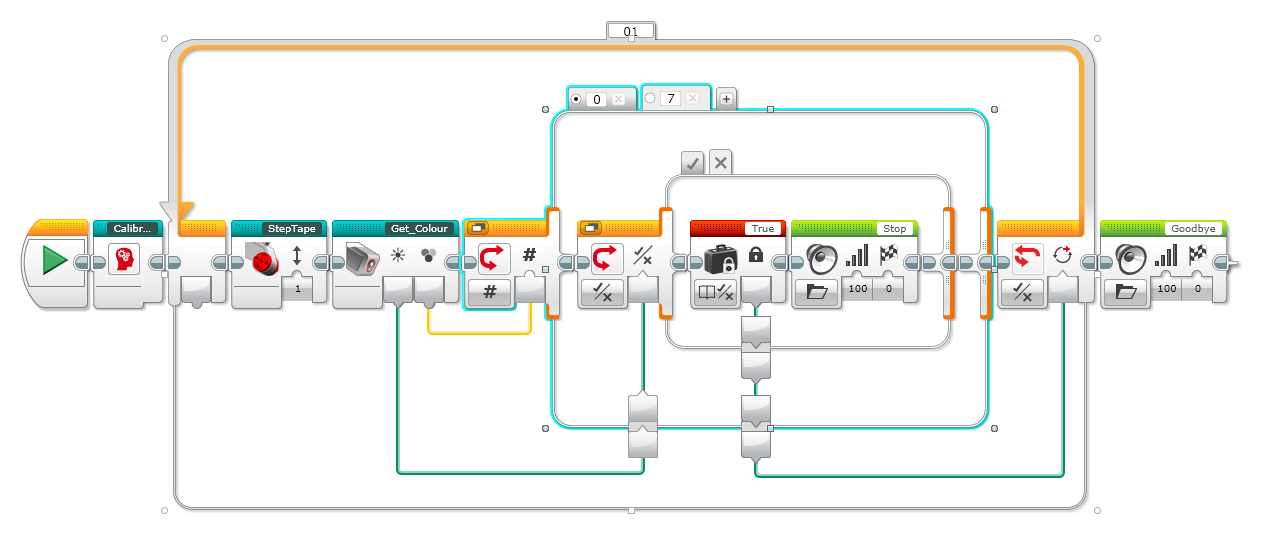
Click on the image above to see a larger view.
This simple program
calibrates the tape and then steps until it finds the first grey block.
If no such block exists the program will terminate when the tape runs
out, as it will detect the backplate of the drive, which is also grey.
Using the grey value in this manner is a simple method for detecting the
tape running out.
Example_2
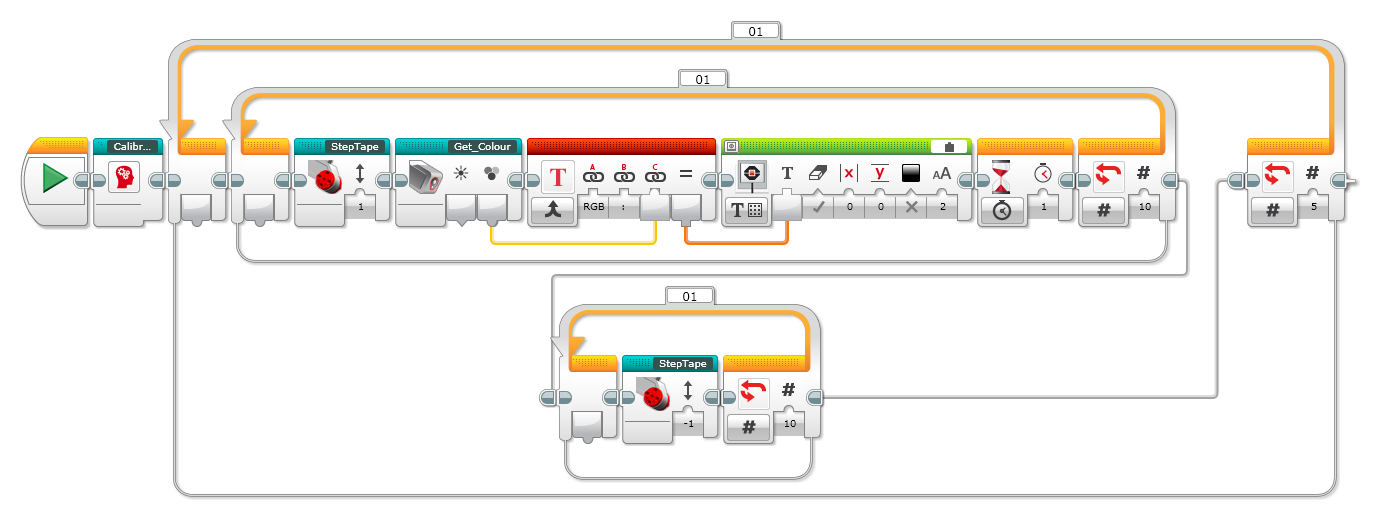
Click on the image above to see a larger view.
This program loops five times, reading ten blocks and displaying their
RGB value before reversing the tape back to the start. This is to show
how the tape handles changing directions.
Building
The build instructions are available as a PDF, or LDraw file if that is
preferred, from the resources section below. It should be noted that
this cannot be built from just the 31313 kit alone as it uses a few
extra parts that I obtained from the 45560 Educational Expansion Kit -
the primary of these being a 3rd 7 x 5 frame. It should be possible to
alter the large motor mounting to use other pieces if so desired.
For the colour sensor you will also need the RGB colour sensor block
from the marvelous MindCub3r site. This
should be available from the ColorSensorRGBBlock sub-section.
The sensor mount is hinged, and held closed by a red pin with bush.
This is to allow the head to be lifted out of place if the tape needs to
be inspected.
Note: The build instructions forget to state that the motor is on port A, and the colour sensor on port 2.
Resources
Feedback
If you have any feedback on this project, documentation, code or any
other aspect, feel free to contact me via
email at lego <@> jander [dot] me [dot] uk.
Permission to use
I'm releasing this design and the EV3 code under the Creative Commons
licence below:

LEGO® Paper Tape Drive by Jerry Nicholls is licensed under a Creative Commons Attribution-ShareAlike 4.0 International License.
Based on a work at http://jander.me.uk/LEGO/tapedrive.html.
Other Projects
Back up to my LEGO® projects.
Disclaimer
LEGO® is a trademark of the LEGO Group of companies which does not sponsor, authorize or endorse this site.